The First 'Word Clock' - Tue, May 1, 2012
I wanted a word clock - they’re expensive. So I built one.
Background
This is my first electrical engineering project. I designed and assembled it from scratch. There are definitely some rough edges.
How it works
Here’s the inside of the clock:
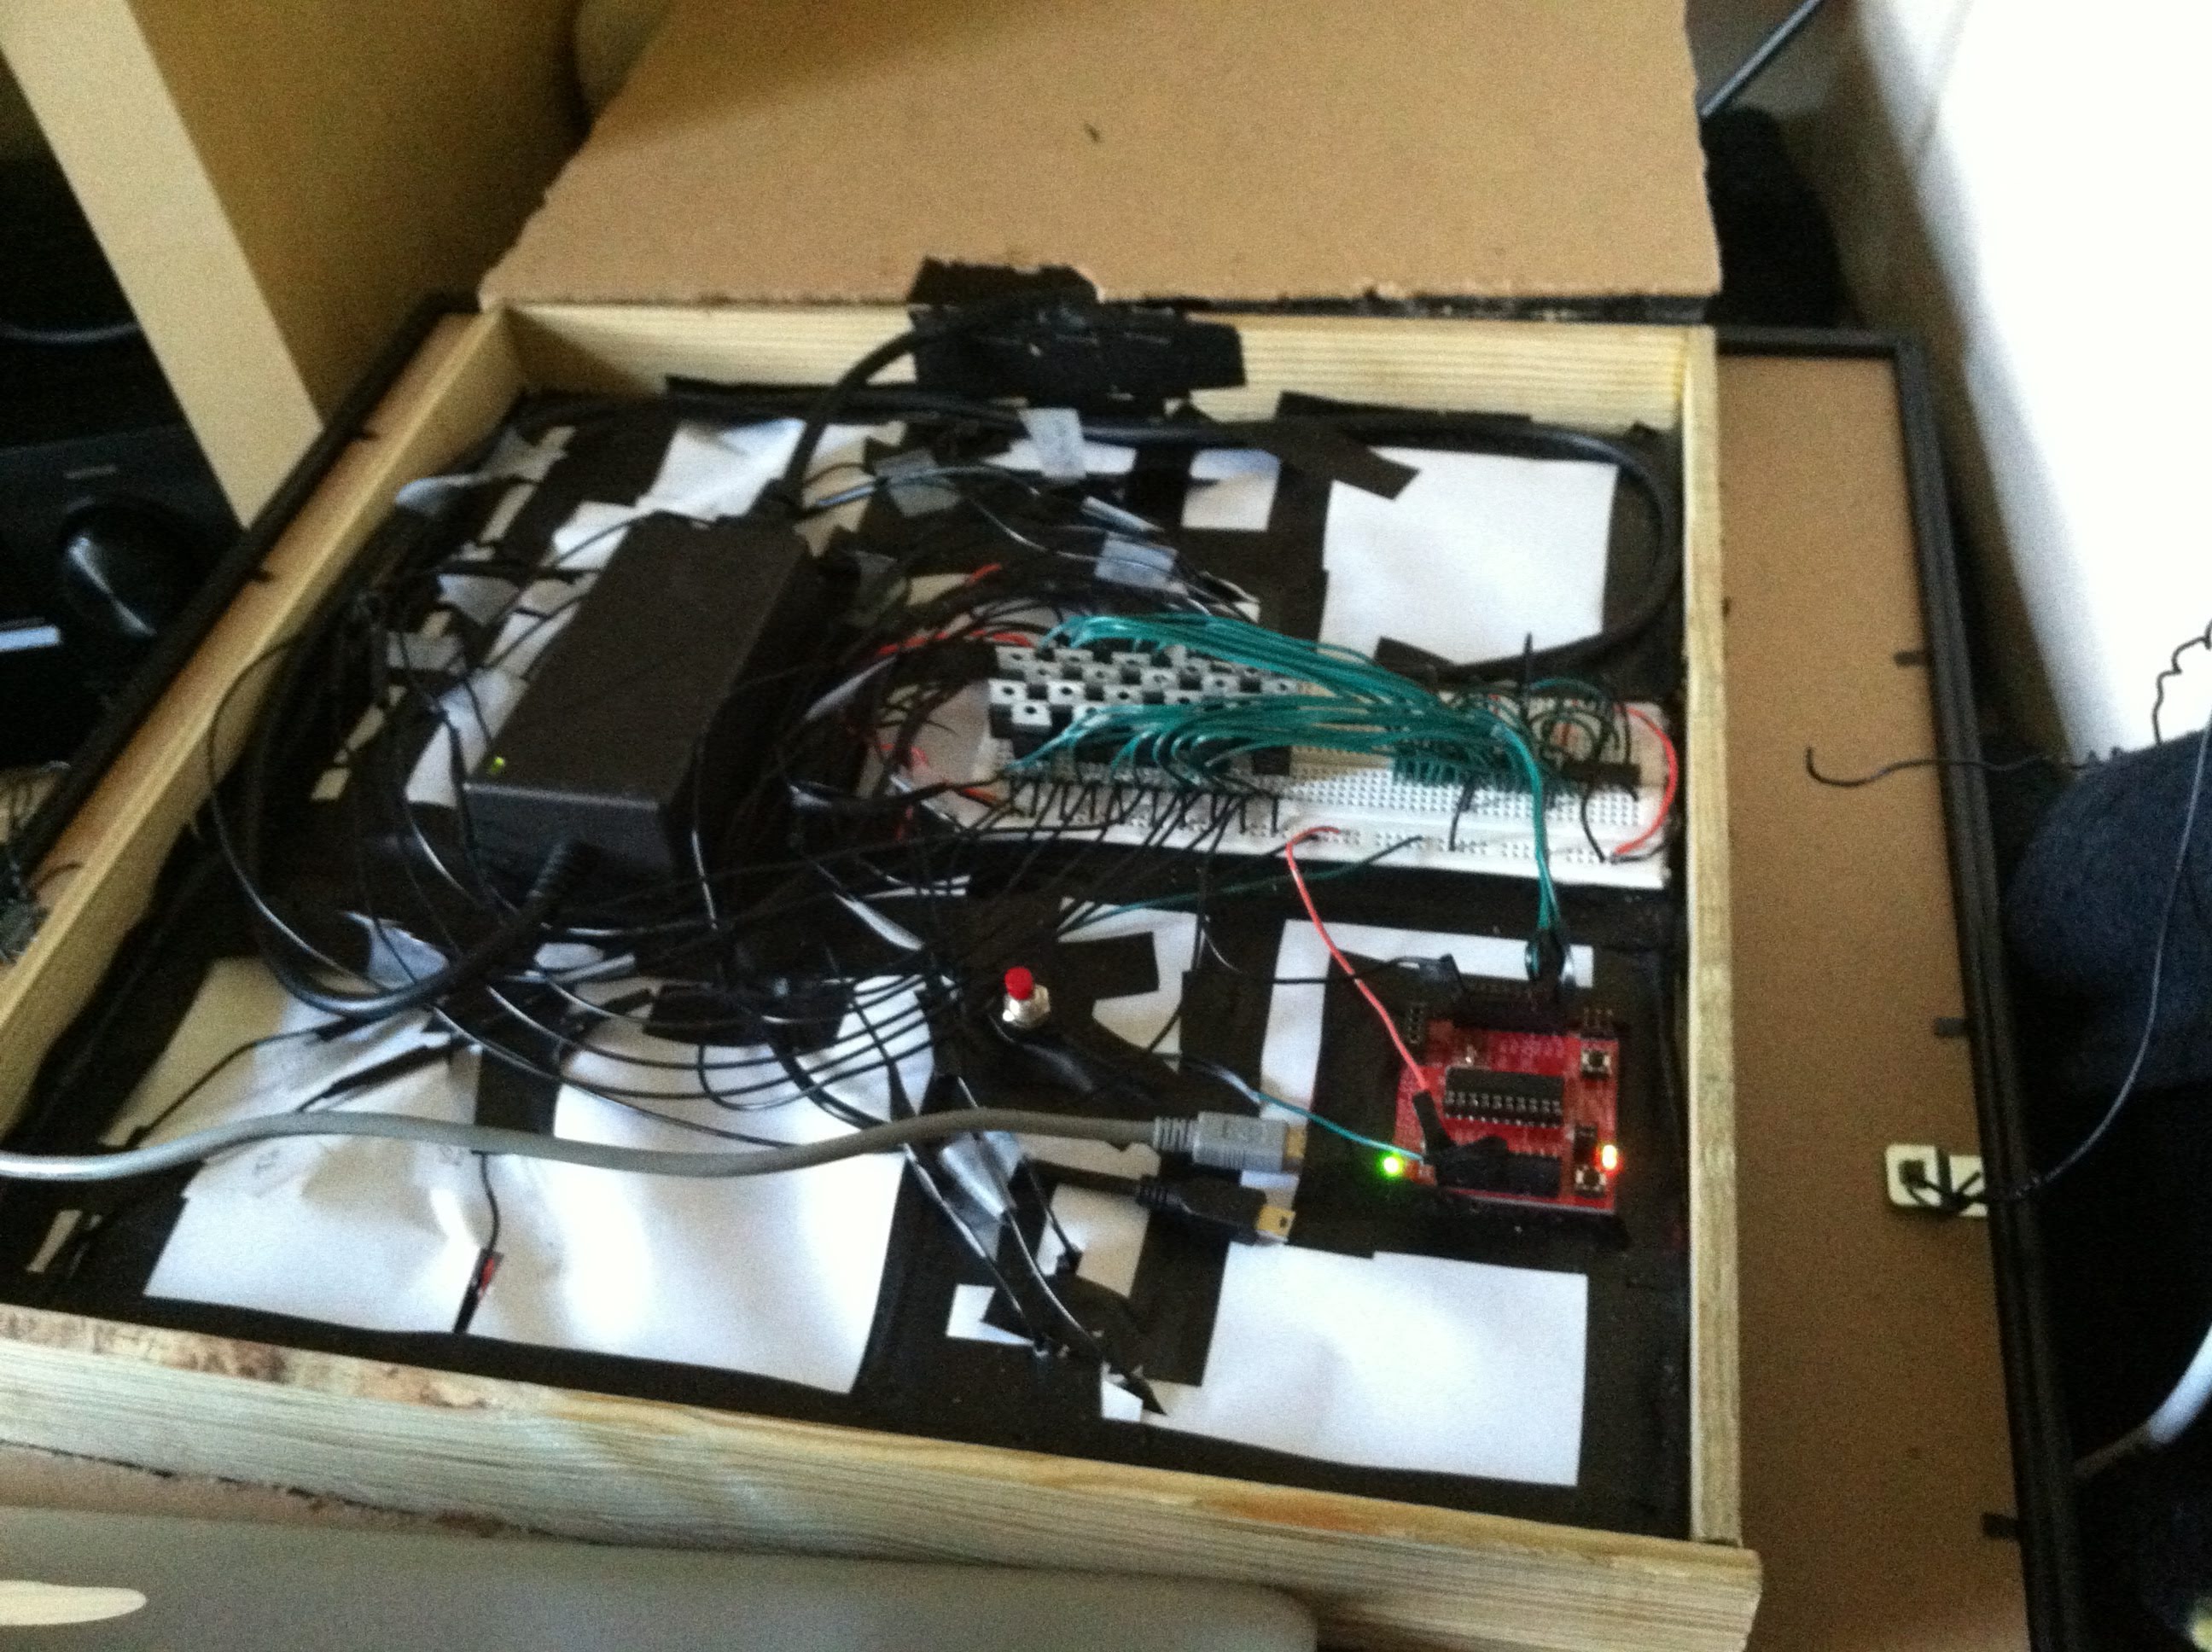
It’s… not pretty. But it works. There’s
- An MSP430 with a 32 KHz crystal for keeping time
- A bank of mosfets to allow the MSP430 to control the 12 volt LED strips
- A set of three 8-bit shift registers to control the sections of the clock
- A power supply that outputs both 5 volts and 12 volts.
- the 12v powers the LEDs
- the 5v is wired to the USB port of the MSP430 launchpad, which then drops it down to 3.3v
- A single button to set the time (missing a pulldown - more on that later)
- The letters are several layers of laser printer transparency film with a pattern I designed.
More pictures


Learnings
-
A button won’t work correctly if you don’t have the appropriate pullup/pulldown resistor. When the button is pressed, it acts as if it is held for a few seconds after it is released while the voltage dissipates. A pulldown would’ve fixed this.
-
A 32 KHz crystal is not going to be exactly 32,768 Hz. This crystal was actually 32,766. Measuring the deviation of the clock over a few days helped me adjust this.
Cheers.